How do you make a bracelet or necklace from (steel) wire?
Easy! This is a popular way to finish jewelry. It takes a little longer than tying elastic, and you need a few more pieces. But with this technique, you're guaranteed to create a strong base for your jewelry. Personally, I find this the best way to make jewelry. And once you get the hang of it, it's very quick!
There are actually two ways to perform this technique. In this article, we'll cover the method using crimp beads and the method using caps.
Would you prefer to use crimp beads only and not the crimp caps? Of course, that's possible too! Just make a loop in the wire in step 1 and thread it back through the crimp bead. Then crimp the crimp bead closed and continue as described in this article. Ignore the crimp cap instructions.

What do you need?
– all beads you want to use for your bracelet or necklace
– a piece of steel wire or nylon wire , a carabiner and an extension chain
– 2 rings, 2 caps and 2 crimp beads (Here you will find all the basic parts)
Tools required: cutting pliers, flat nose pliers and round nose pliers
Step 1
Thread the crimp bead around the piece of steel wire. Pinch it closed as far as possible at the top. Now you can fold a cap around it and crimp it closed firmly. There's a small opening at the bottom of the cap where your wire fits perfectly. Make sure the two holes at the top of the cap are aligned correctly.


Step 2
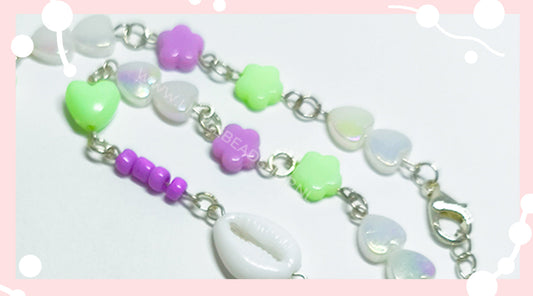
Open a jump ring and attach the cap and a clasp. Now carefully close the jump ring. The first part of your bracelet is complete! (See the pictures.)
You can also seal the ring by applying a small amount of jewelry glue or clear nail polish to the opening. This will completely seal the opening.


Step 3
Thread all the beads as desired onto the piece of steel or nylon wire. Finished? Then you can move on to step 4.
Step 4
Now that you've strung all the beads to your liking, we can start finishing the bracelet. This is done in the same way as in steps 1 and 2. Thread a crimp bead onto the wire and pinch it closed just above the beads. It's important not to pinch the crimp bead too close to the beads. You need to leave some space to fold the cap around it. About 3mm to 5mm is sufficient for this.
Step 5
Fold the cap around the crimp bead, ensuring the wire fits neatly into the recess at the bottom. Squeeze the cap firmly closed. It's normal for the cap to remain somewhat wobbly; in that case, you can choose to squeeze the rounded part of the cap a little tighter. Now, open a jump ring and hook your bracelet and an extension chain onto the jump ring. Close it firmly again and, if desired, seal the jump ring with glue or clear nail polish.

Do you have any questions or are you having trouble? Feel free to send us an email or message! You can send your email to info@littlebeadshop.nl , or message us on Instagram or Facebook. We're happy to help!